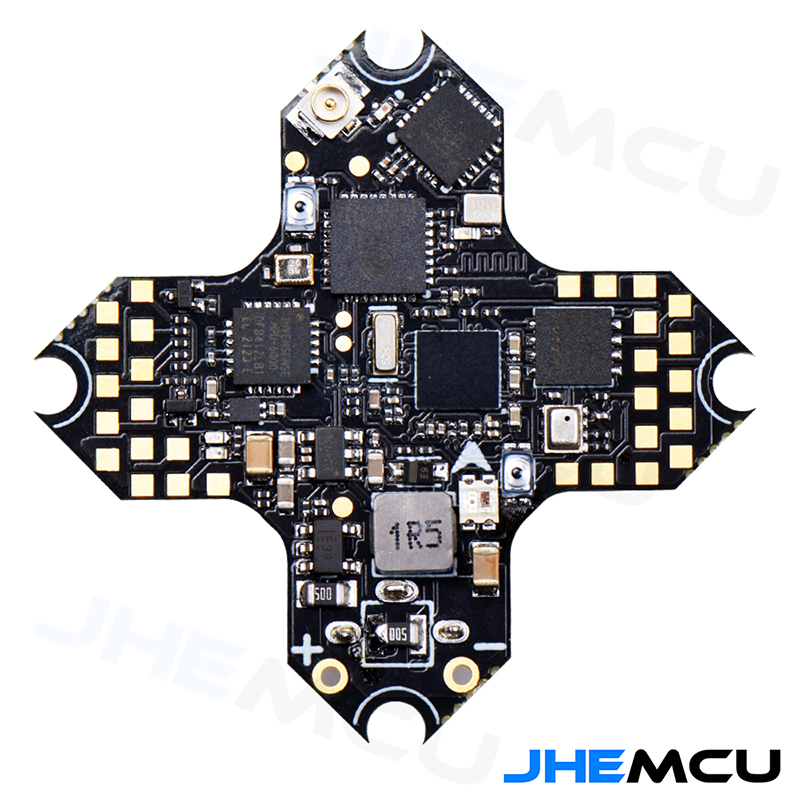
JHEMCU GSF405 5A ELRS AIO FC
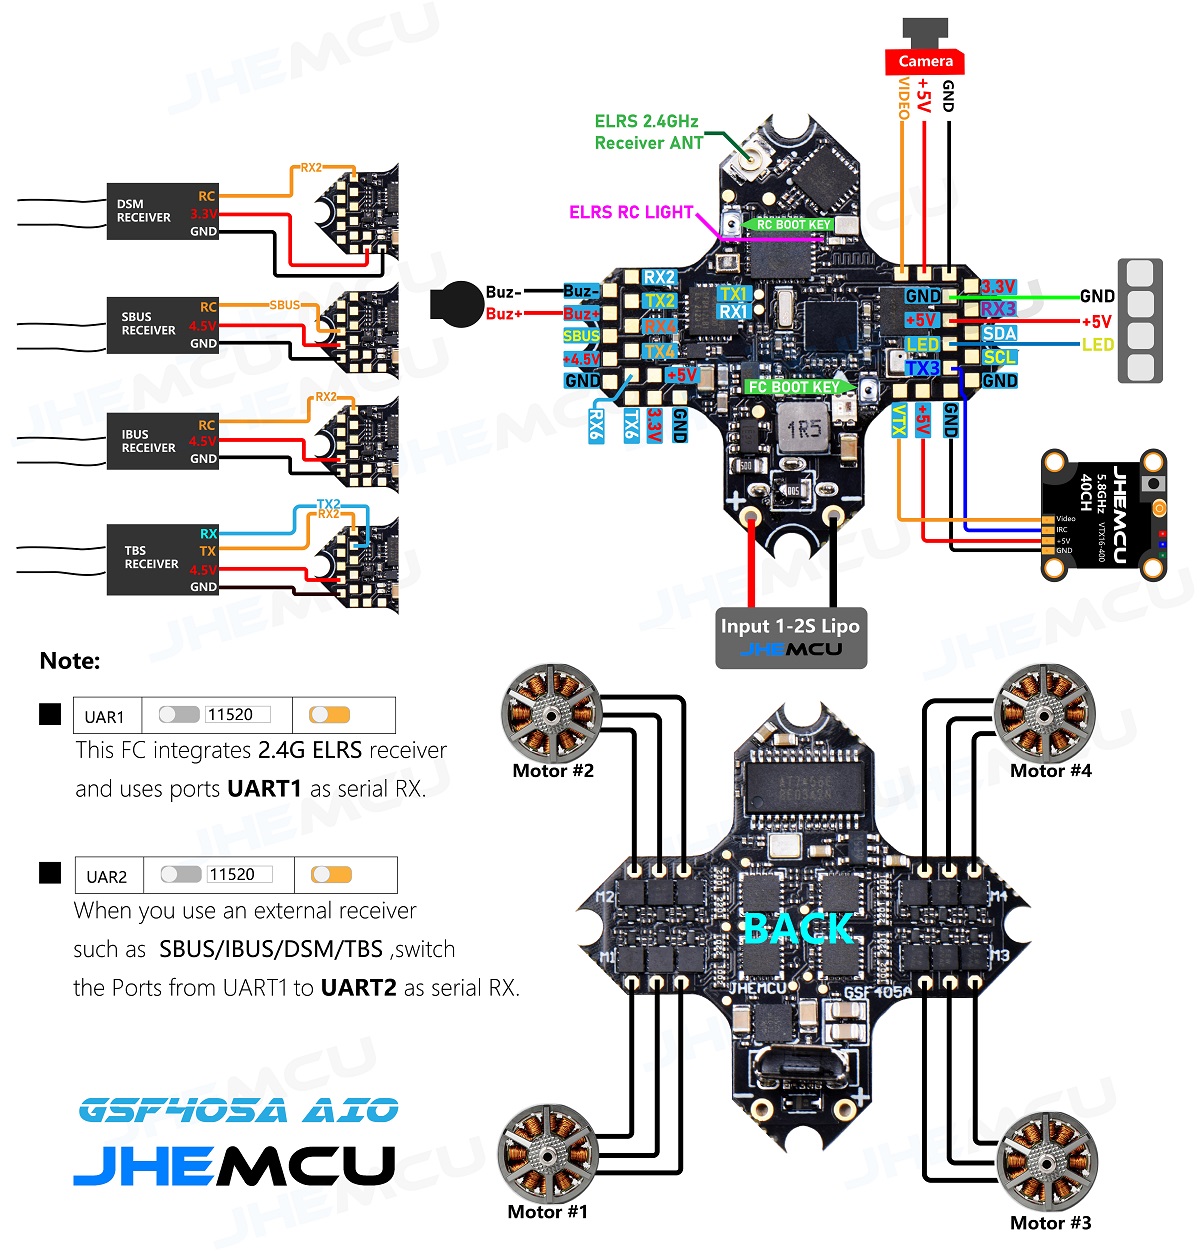
JHEMCU GSF405A is a 1-2S F4 AIO with integrated 4-in-1 5A ESC and ELRS 2.4GHz receiver. It has 5 serial ports (UART1, UART2, UART3, UART4, UART6), one I2C port, and one SBUS interface. (The serial port used by SBUS is RX2), onboard a WS2812 LED light, and WS2812 LED pads. Also built-in 8MB blackbox and?BMP280 barometer, buzzer interface, camera interface.
GSF405A AIO FC has?the built-in full ELRS receiver, connected on the UART1 port. It is not an SPI receiver, so it the ELRS firmware can be updated via Wi-Fi or Betaflight serial passthrough. ELRS firmware target is?DIY_2400_RX_ESP8285_SX1280.
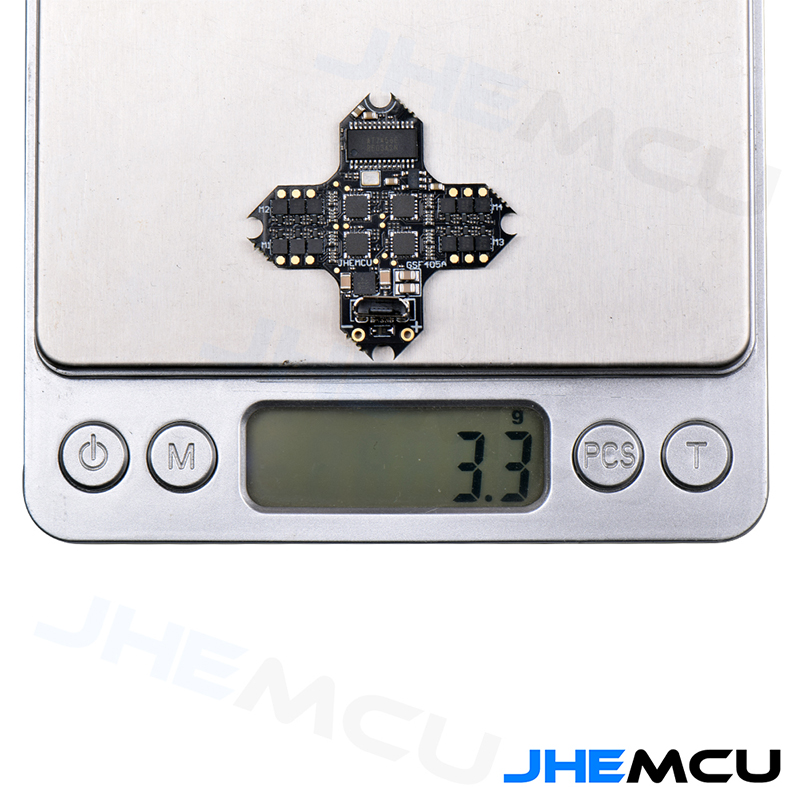
And the board weights only 3.3grams?(without antenna).
JHEMCU GSF405 5A ELRS AIO connection diagram
Available @
Aliexpress: https://www.aliexpress.com/item/4000822415771.html
Flight control parameters:
CPU: STM32F405
Gyroscope/Accelerometer: MPU6000
OSD: AT7456E
Barometer: BMP280
Black box: 8MB
I2C: Support
BEC: 5V
UART: UART1 (ELRS), UART2 (external RC), UART3, UART4, UART6
USB: micro USB
Size: 25.5*25.5MM M2
Receiver: ELRS (CRSF), TBS (CRSF), SBUS, IBUS, DSM2, DS MX
Support programmable LED such as WS2812
Support buzzer
Built-in voltage and current sensors
Weight: 3.3 grams
ELRS RX parameters:
Frequency: 2.4GHZ
Working Agreement: CRSF (Betaflight)
Firmware: DIY_2400_RX_ESP8285_SX1280
ELRS receiver indicator status:
Double flash: code matching mode
Slow flashing: No transmission signal received
Steady on: Received transmit signal
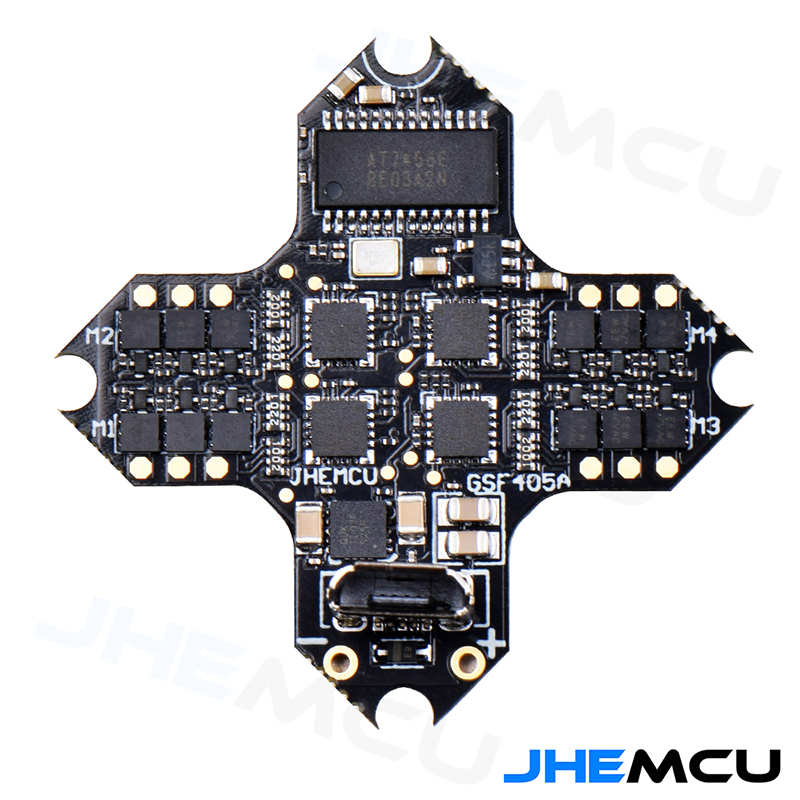
ESC parameters:
Support PWM, Oneshot125, Oneshot42, Multishot, Dshot150, Dshot300, Dshot600
Input voltage: 1S-2S Lipo
Continuous current: 5A
Firmware: BLHELI_S S_H_50_REV16_7.HEX
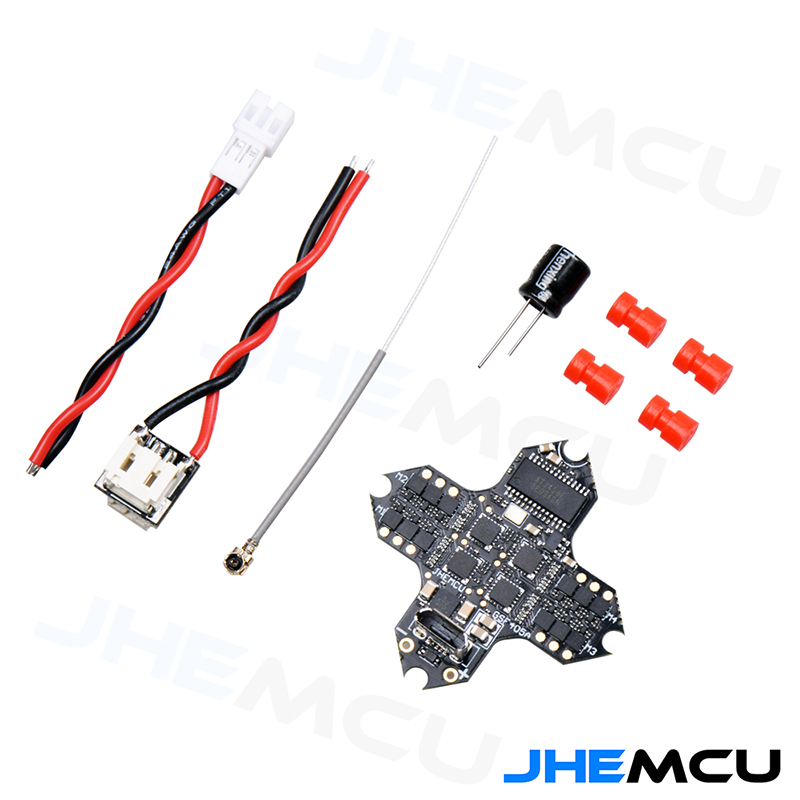
Package contents:
GSF405A board *1
2.4G antenna *1
2.0MM plug cord *1
470UF/10V capacitor *1
M2*6.5MM shock-absorbing ball *4
2S series board *1
Binding:
1. Connect USB to power the flight controller. After inserting the USB for the first time, disconnect the USB as soon as the LED on the receiver turns off. Repeat the operation twice, when the USB is inserted for the third time, the LED will start to flash double, and the receiver will enter the binding mode.
Related Posts
-
 BetaFPV SuperG NanoTX – first dual diversity ELRS TX
BetaFPV, in collaboration with the ELRS developer team, has unveiled another first in the
BetaFPV SuperG NanoTX – first dual diversity ELRS TX
BetaFPV, in collaboration with the ELRS developer team, has unveiled another first in the -
 Radiomaster Pocket Radio
Radiomaster has unveiled its latest creation, the Radiomaster Pocket Radio, a compact but feature-packed
Radiomaster Pocket Radio
Radiomaster has unveiled its latest creation, the Radiomaster Pocket Radio, a compact but feature-packed
I got this flight controller last week and built it up right away as a 65mm tinywhoop. Been flying it a ton and it’s been great. It’s my first flight controller for JHEMCU and I’m very pleased with the quality. I love that they put the ELRS receiver on a uart and not spi so we can update it independently from betaflight.
Thanks for the feedback!
I’ve been trying to bind this to my happymodel elrs module and can’t get it to work. Idk what else to try, any help?
First make sure you have the same FW version on the receiver and transmitter module. Then make sure you have flashed the firmware with the same passphrase. This should be enough for the receiver to bind automagically.
It seems like the elrs cannot be flashed through WiFi although they have the esp chip onboard.
I don’t have this board on hand, but some searching on the inet says, that WiFi has some extremely low range, maybe only a few centimeters from the board. Try put your phone as close to the board as possible and then search for the “ExpressLRS RX” WiFi access point.
The Betaflight serial passthrough might be the other option. Keep the “RC boot” button pressed while powering the board to put the receiver ESP chip into the bootloader mode. Also you might have to hold down *both* buttons on the FC when you plug in USB as per some user advice.
I would like to update Express LRS.
How do I get into the wifi.