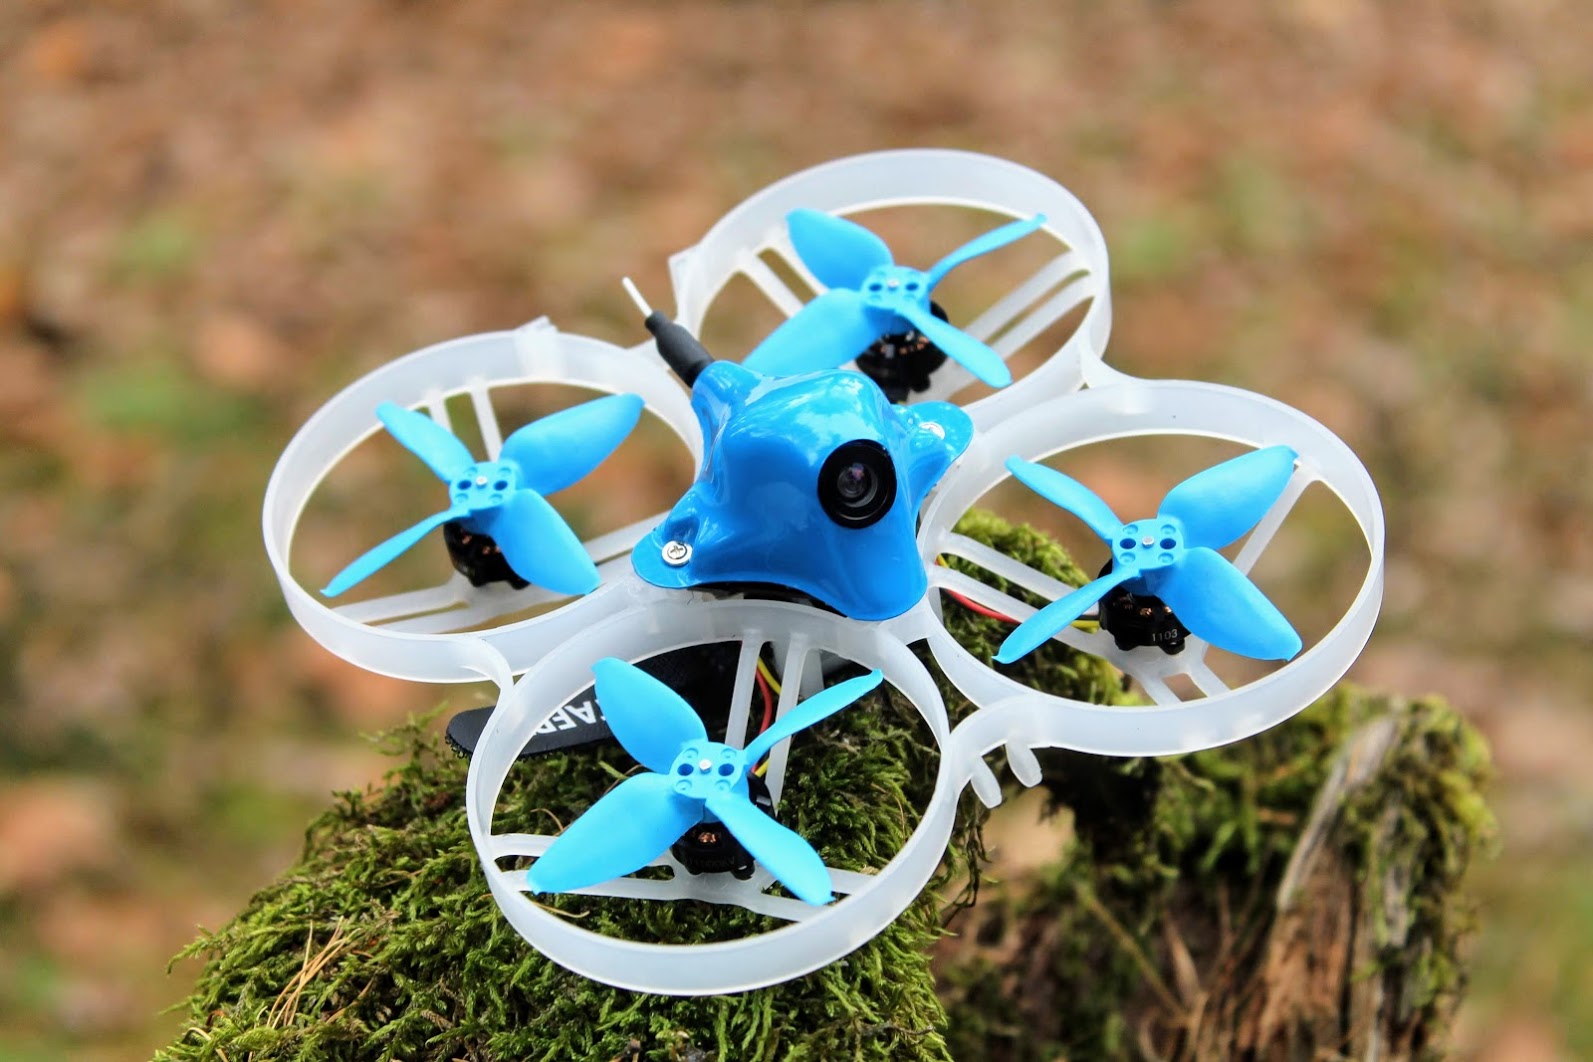
Review: Beta85 Pro 2 brushless whoop
Beta85 Pro 2 is the biggest brushless whoop from the Pro 2 series – Beta65 Pro2, Beta75 Pro2, Beta85 Pro2. Beta85 Pro 2 was inspired by the similar configuration brushless whoop Shutterbug85, originally built by the user ShutterBug. It flew so amazingly that BetaFPV decided to start manufacturing it.
Specifications
- Weight: 42g (without battery)
- FC:F4 2S AIO FC (with XT30 cable)
- Motors: 1103 11000KV with connector
- Props: EMAX Avan 2” 4-Blade Propellers (1.5mm Shaft)
- Camera: A01 AIO Camera
- Frame: Beta85 Pro2 Frame
- Canopy: Canopy for Tiny Whoop Drone
- Receiver Option: SPI Frsky FCC / XM Frsky LBT/ DSMX / Futaba S-FHSS / Flysky/TBS Crossfire
- Battery: 300mah 2S Battery
- Flight time: 2 minutes and a half with 300mAh 2S battery (smooth flight in a windless environment)
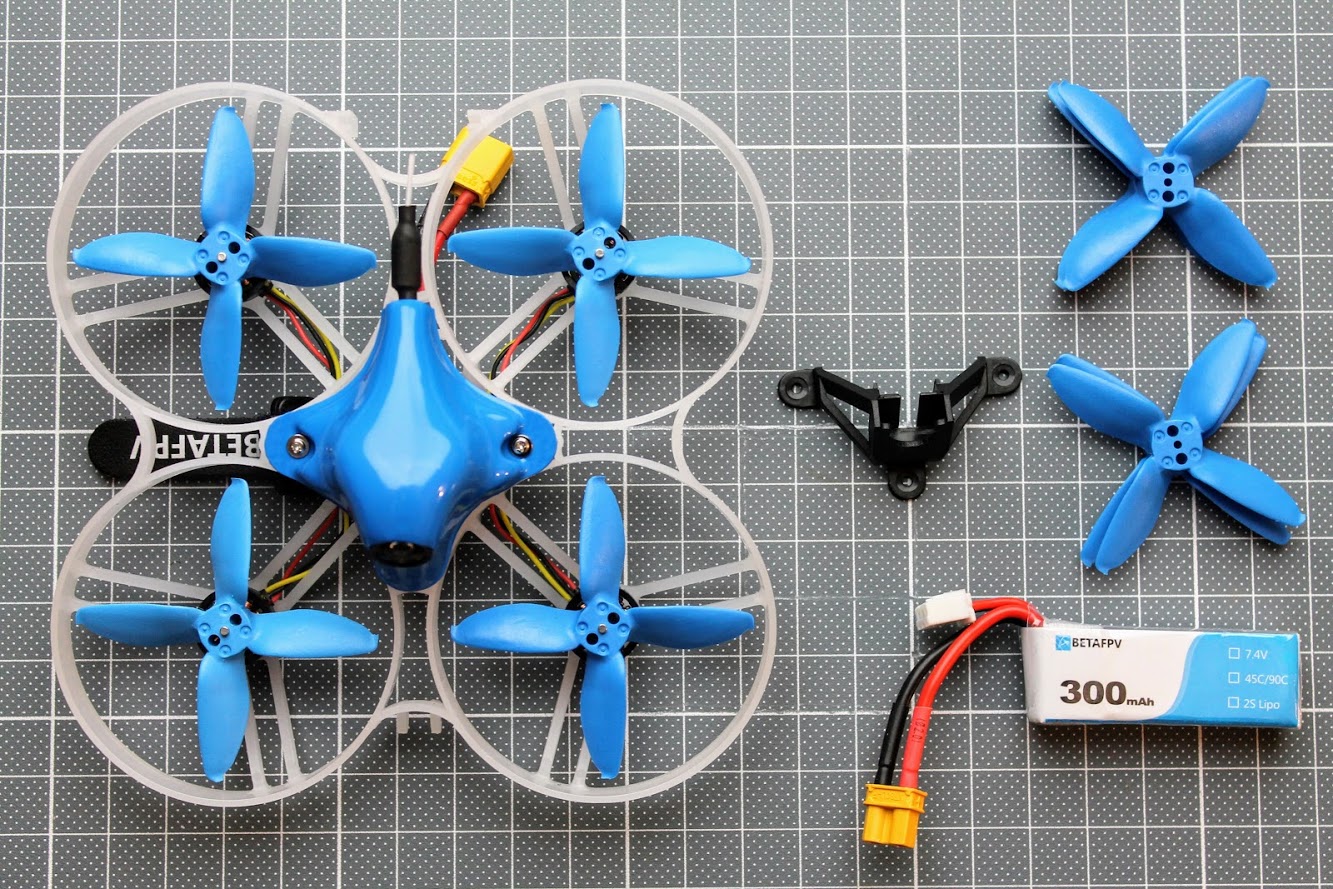
Contents
Beta85 Pro 2 package contains whoop itself, 4 spare propellers, additional camera holder and BetaFPV 300mAh 2S lipo battery.
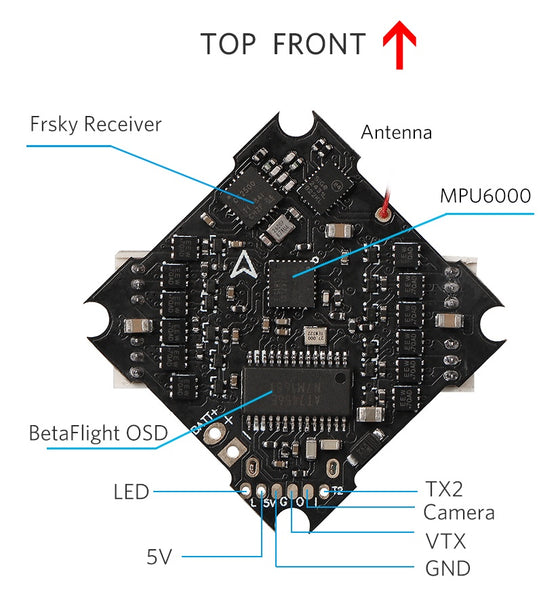
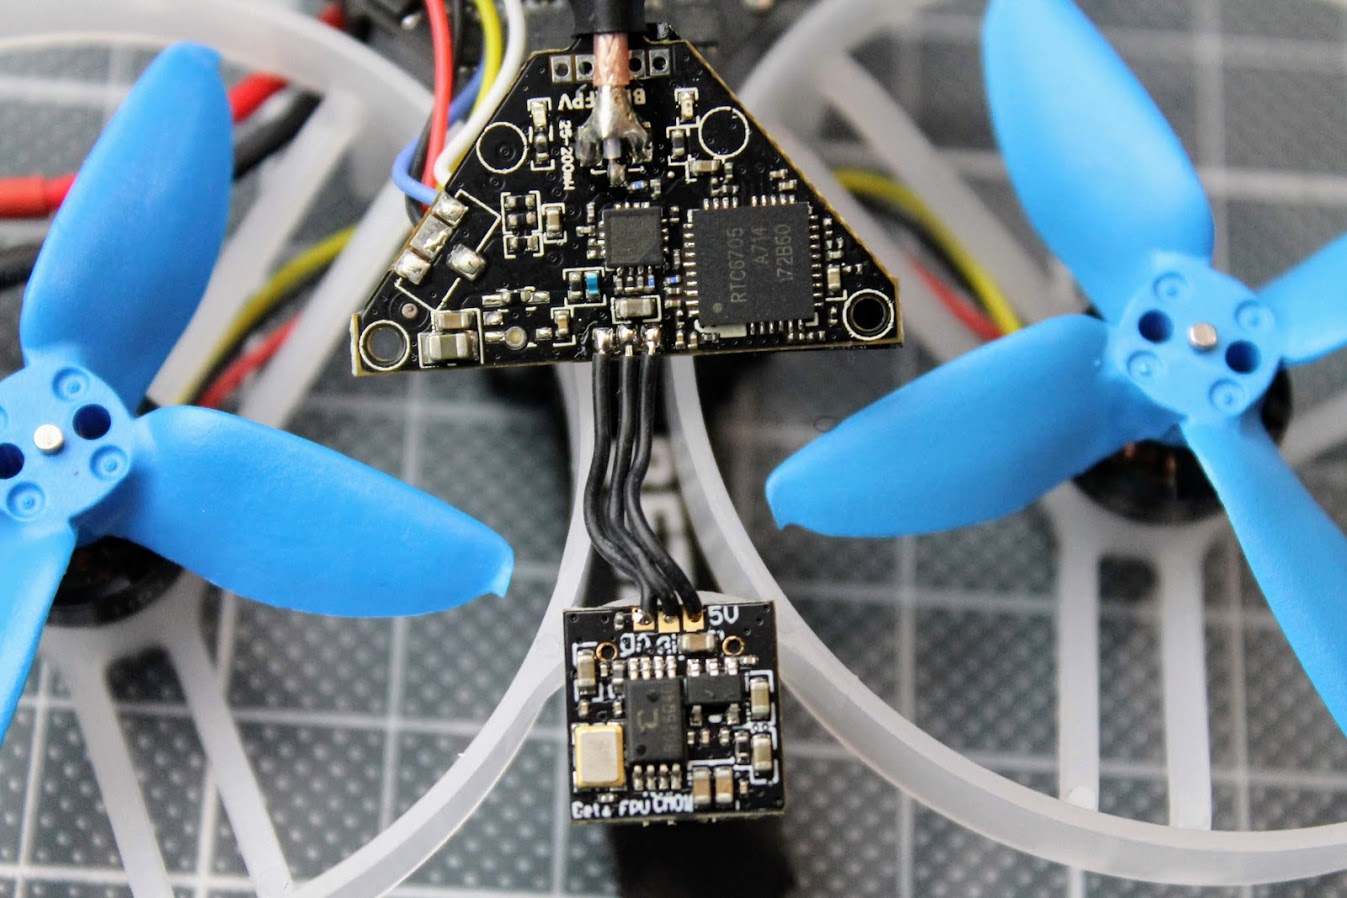
The heart of the Beta85 Pro 2 is BetaFPV F4 1-2S AIO Brushless Flight Controller, with 5A (6A burst) ESCs.

The layout and pinout of the BetaFPV F4 1-2S AIO board

FC board has 3 status leds.

| LED | Status | Description |
| Receiver LED ( Green) | Solid | Connected or in bind mode |
| Receiver LED ( Green) | Flashing | Not connected |
| Power LED ( Blue ) | Solid | Power on |
| Status LED ( Red ) | Solid | Motor Armed |
Beta85 Pro 2 is powered by BetaFPV 1103 1100KV brushless motors.
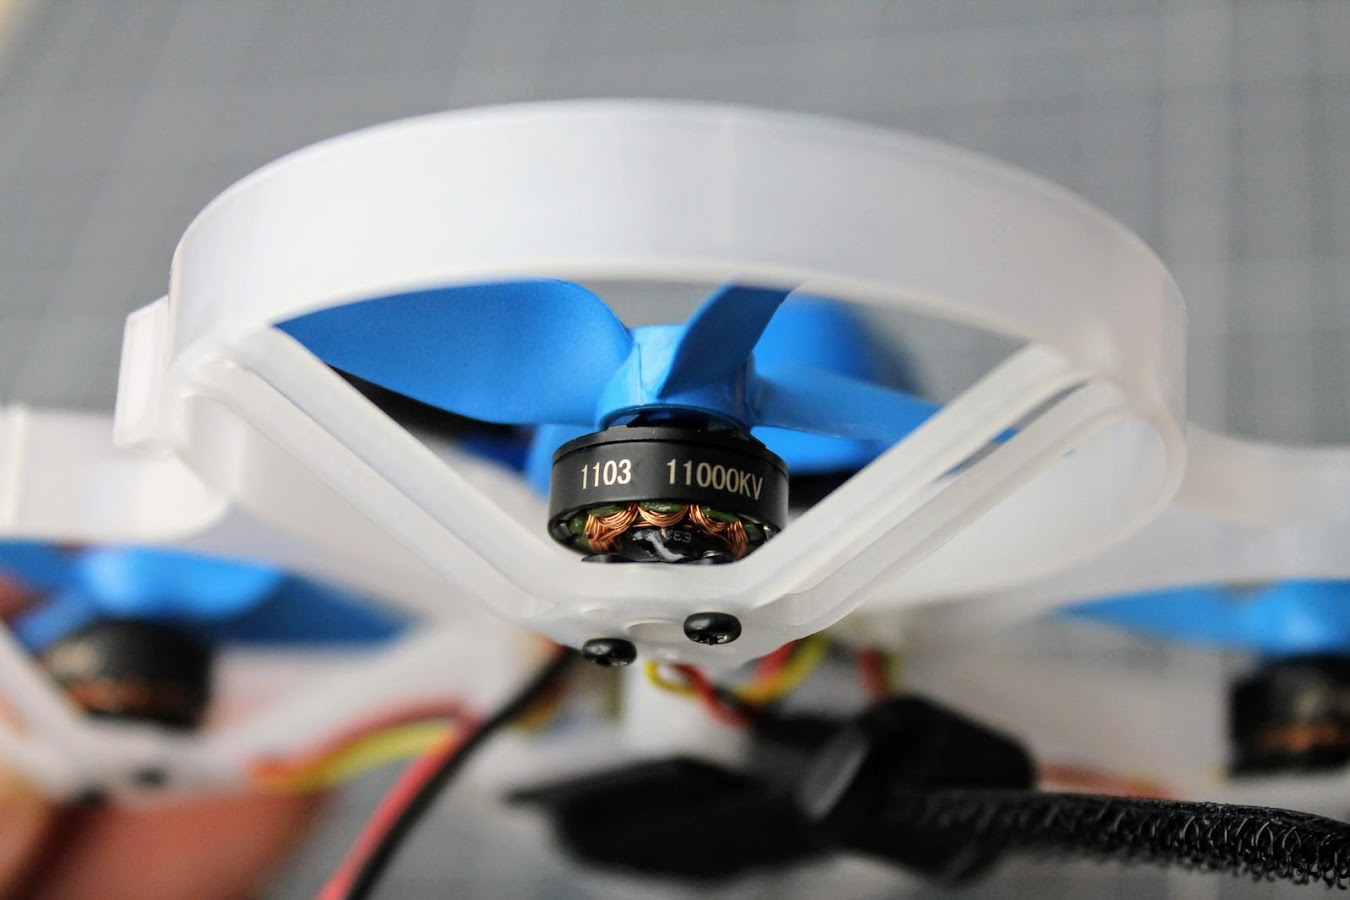
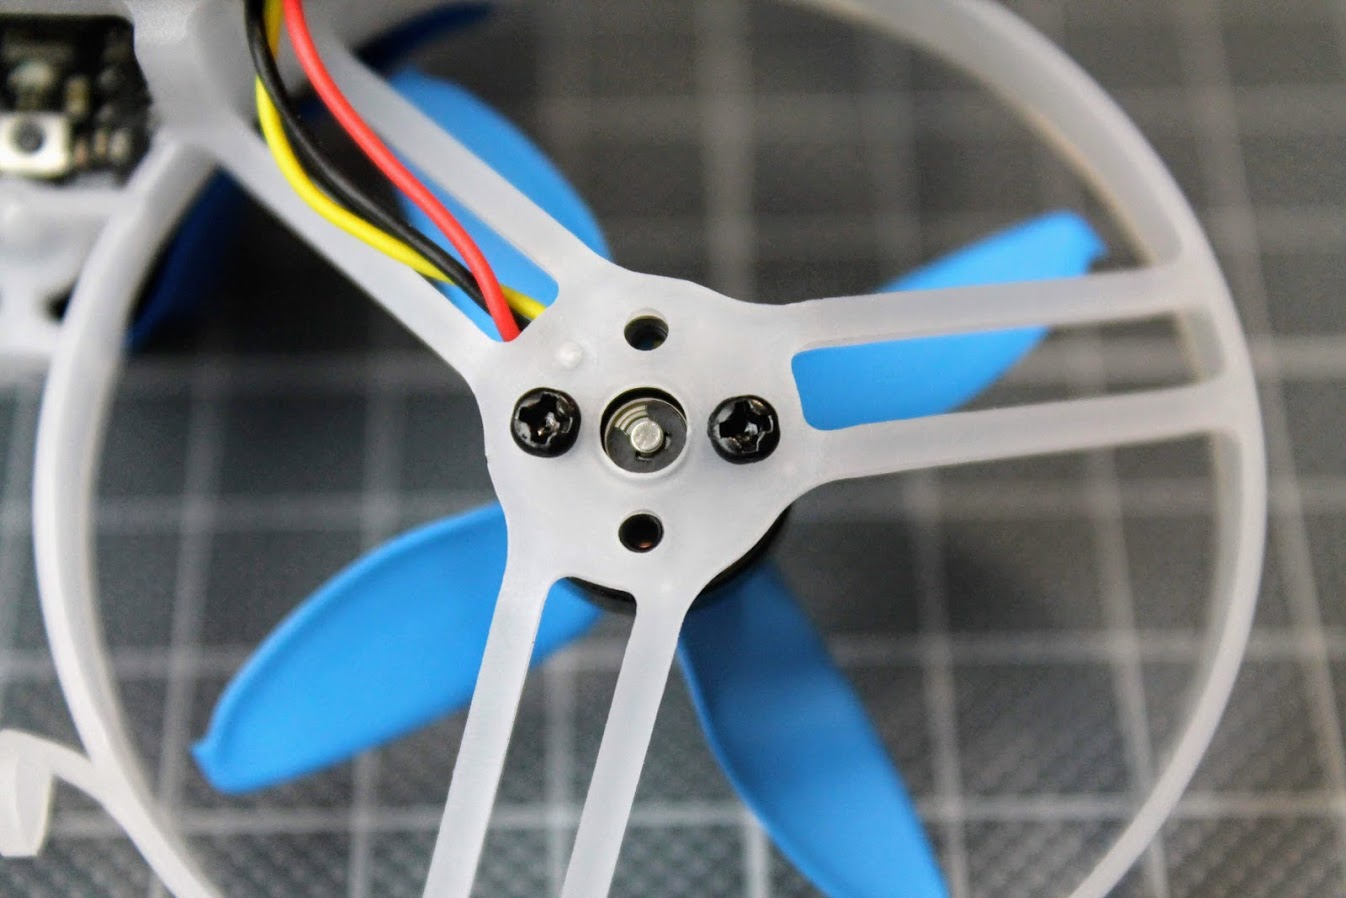
Motors has no T mount holes and propellers are press fit mounted.
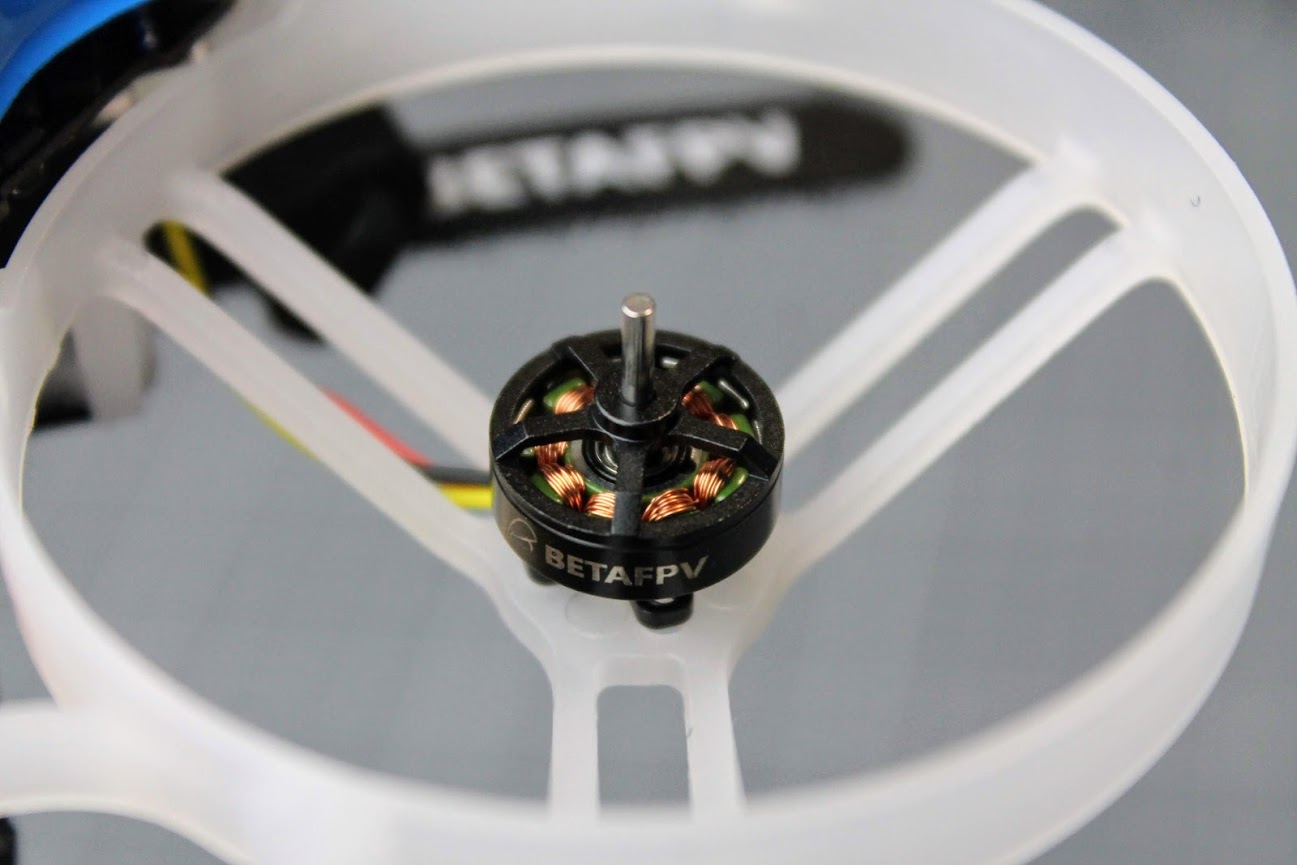
Motors are fixed with only two screws out of the four. This is to minimize the weight even more. Two screws are really enough and should make no concern.
VTX/Camera is Beta FVP A01 Camera and A01 VTX combo. 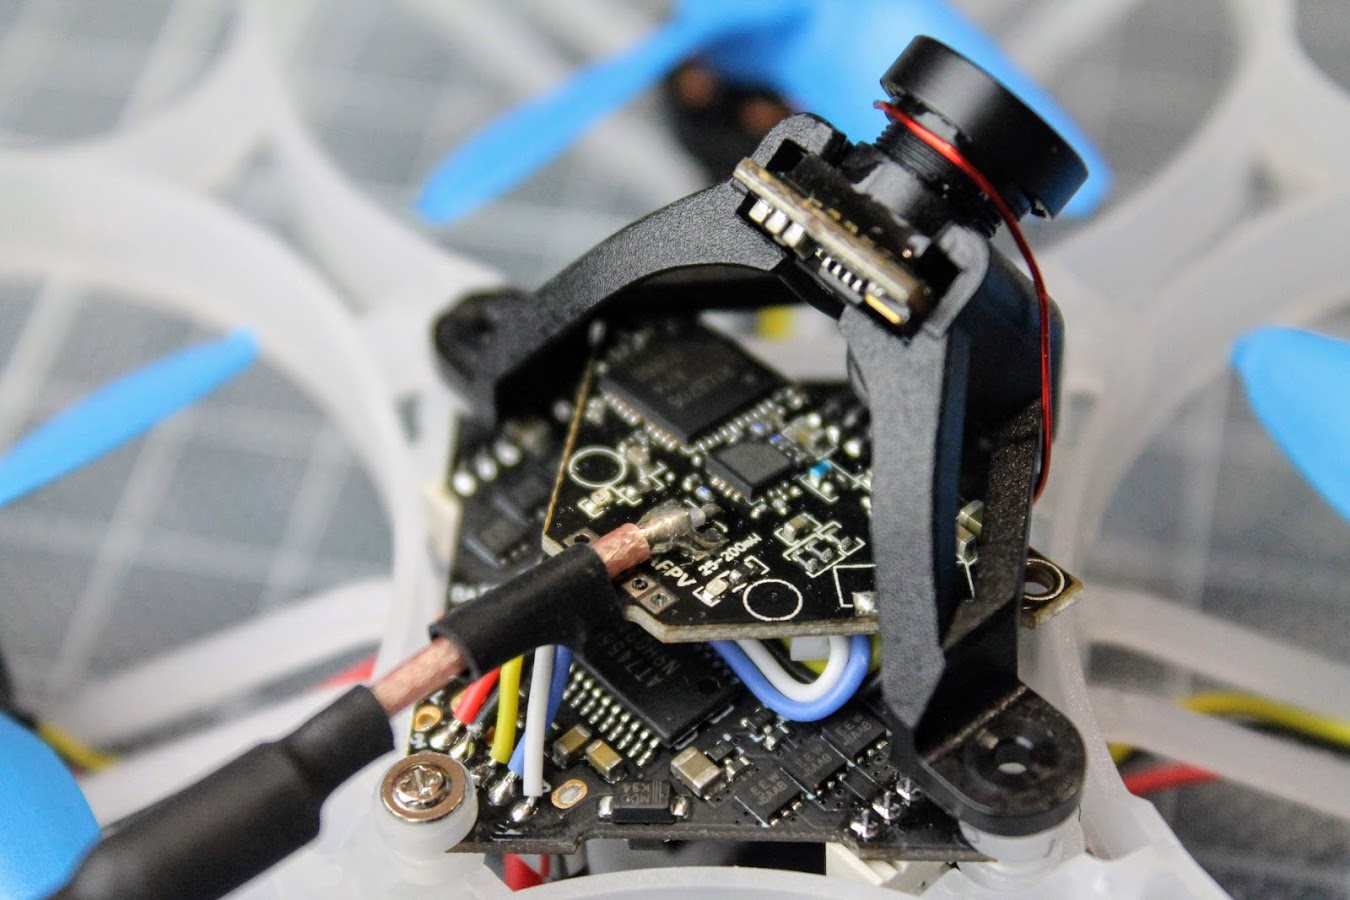
Camera and VTX weights only 3.2 grams. VTX has 25-200mW power levels, standart Channel list and can be controlled by SmartAudio.

| Blue LED | Red LED | Power Status |
| Flash Solid | Off | 25mW |
| Flash Solid | Flash Solid | 200mW |
| Off | Flash Solid | PitMode |
A01 VTX connection diagramm:

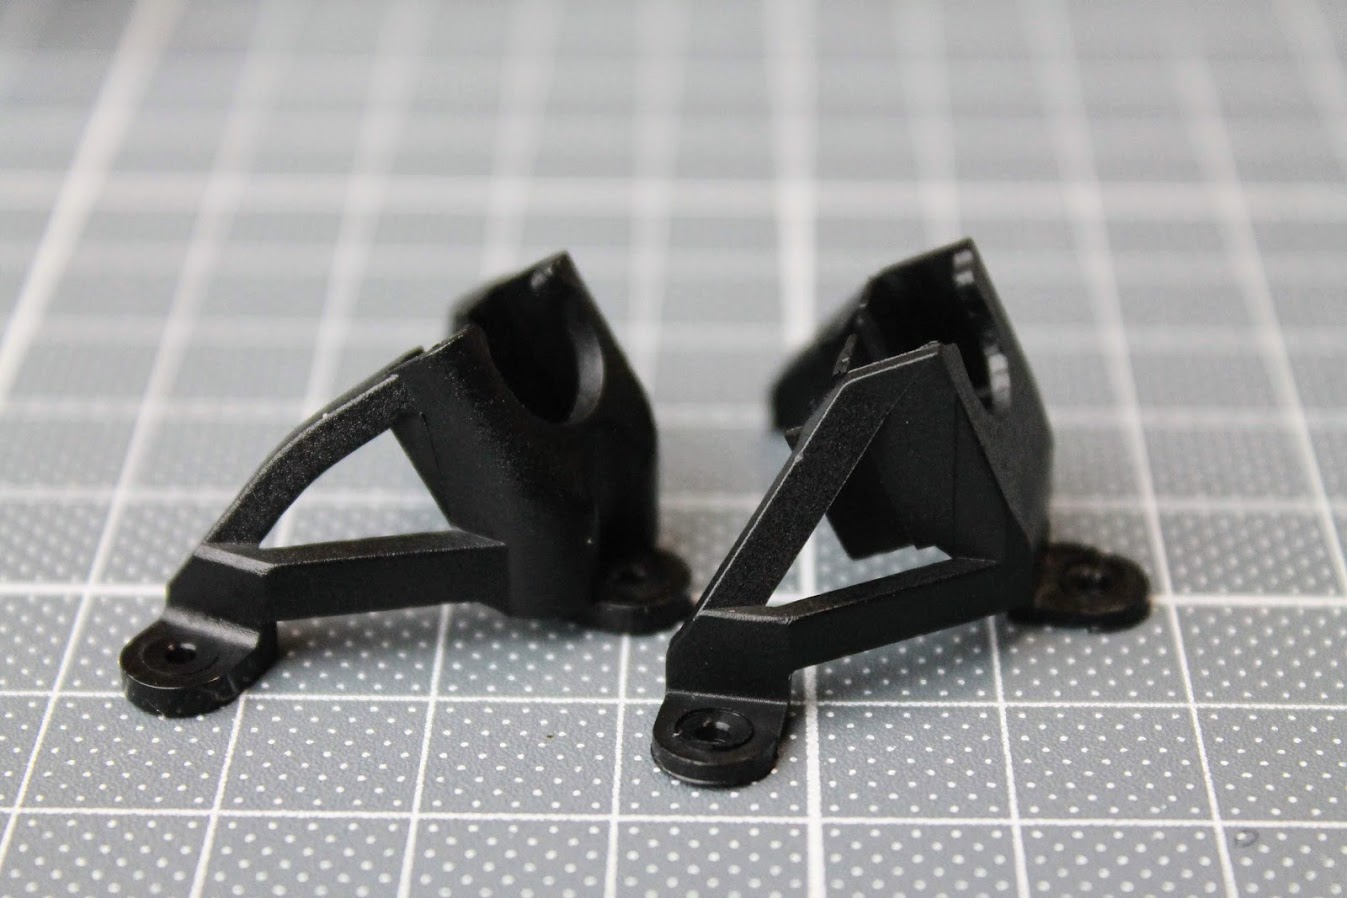
Beta85 Pro 2 comes with two camera mounts. 35° degrees mount is preinstalled by default and 25° degrees mount is available for less angle and lower speeds flying.

Camera canopy is extremely fragile and will definitely break. This is how mine broke after the third flight:

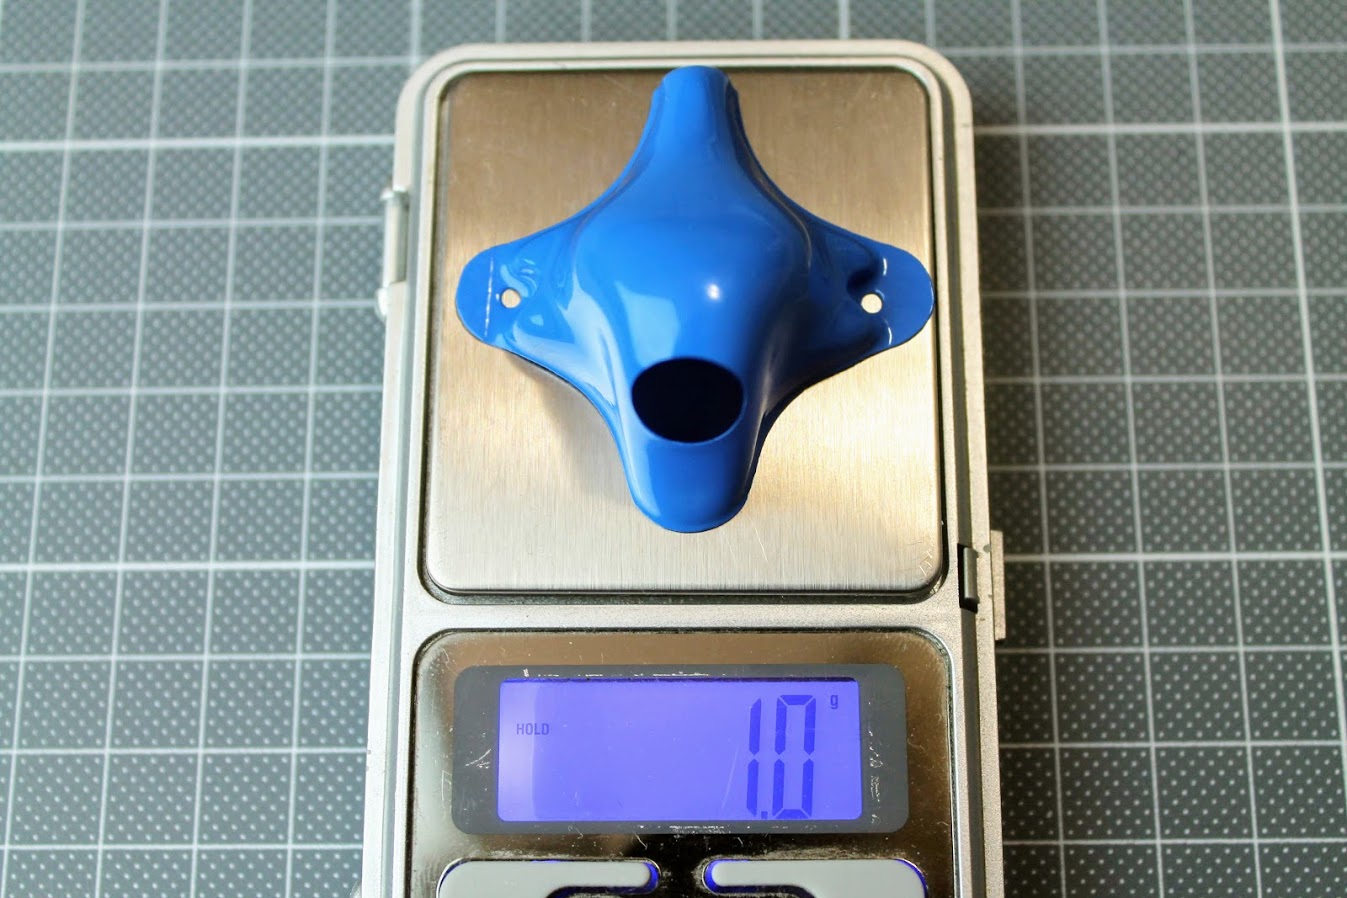
The only explanation why BetaFPV is using this thin canopy on this fast and relatively big whoop is to save the weight. And this canopy is really lightweight – only 1 gram.
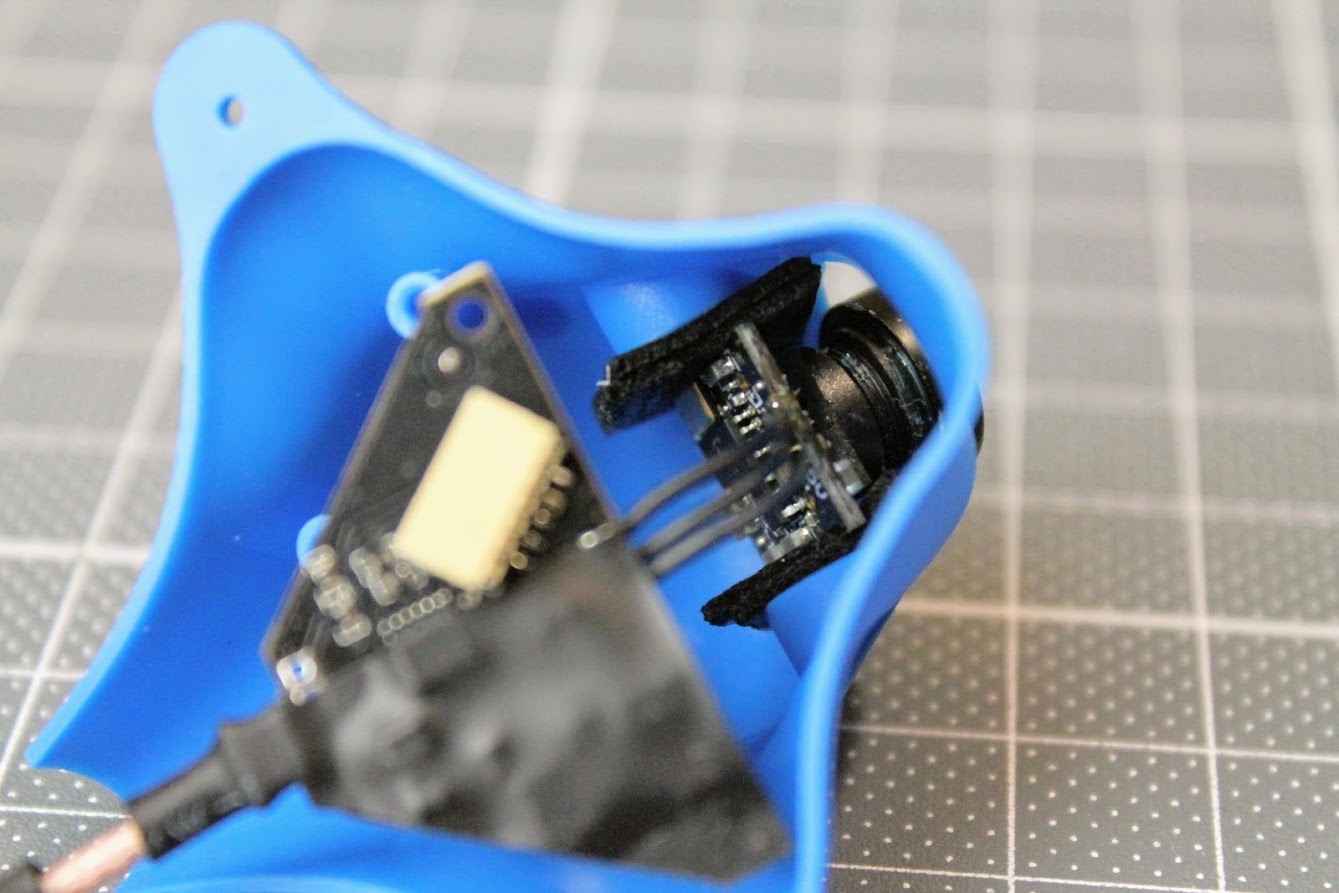
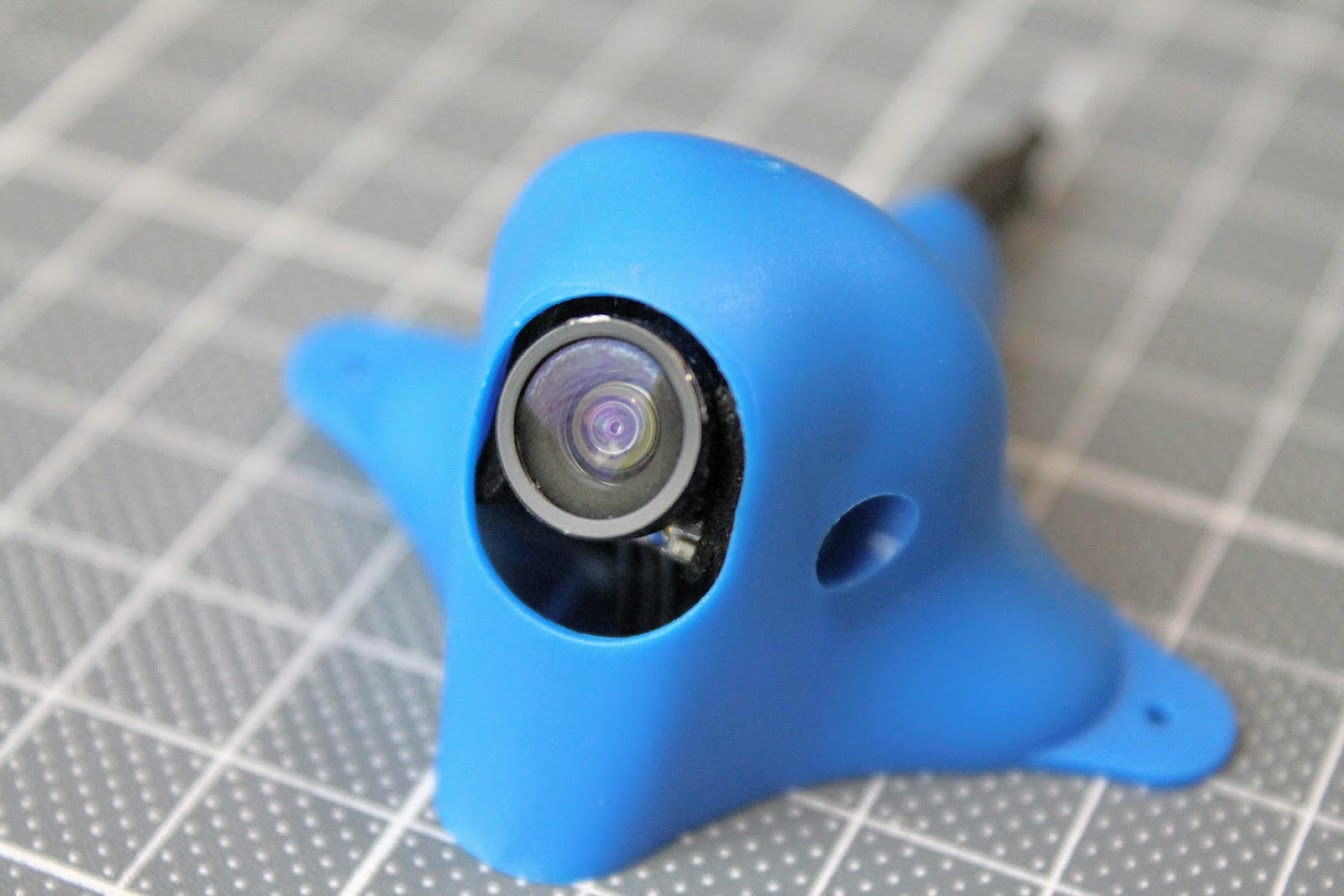
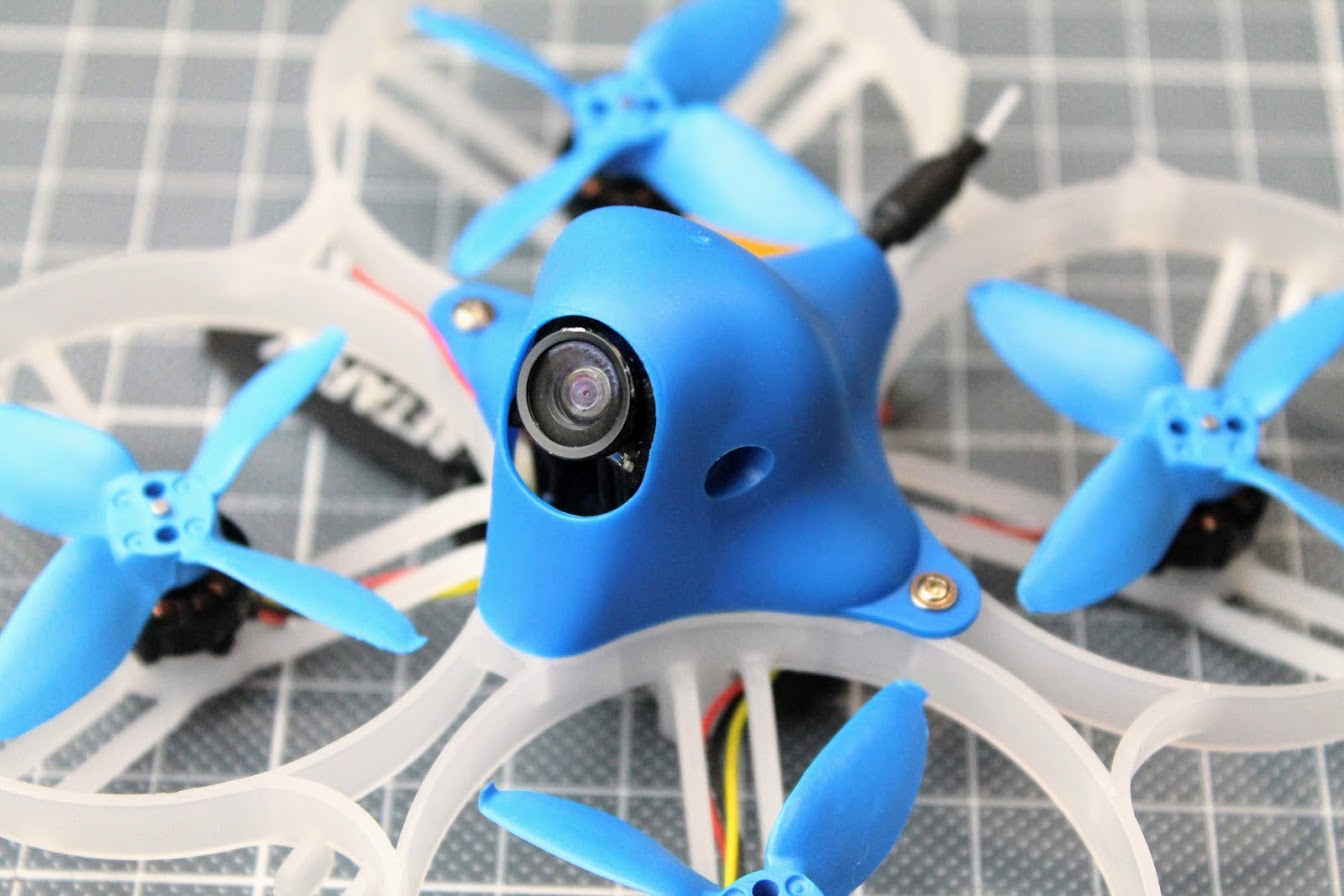
I have replaced the supplied canopy with BetaFPV canopy for EOS2 camera. I’ve used double sided tape to fix the camera in the canopy.

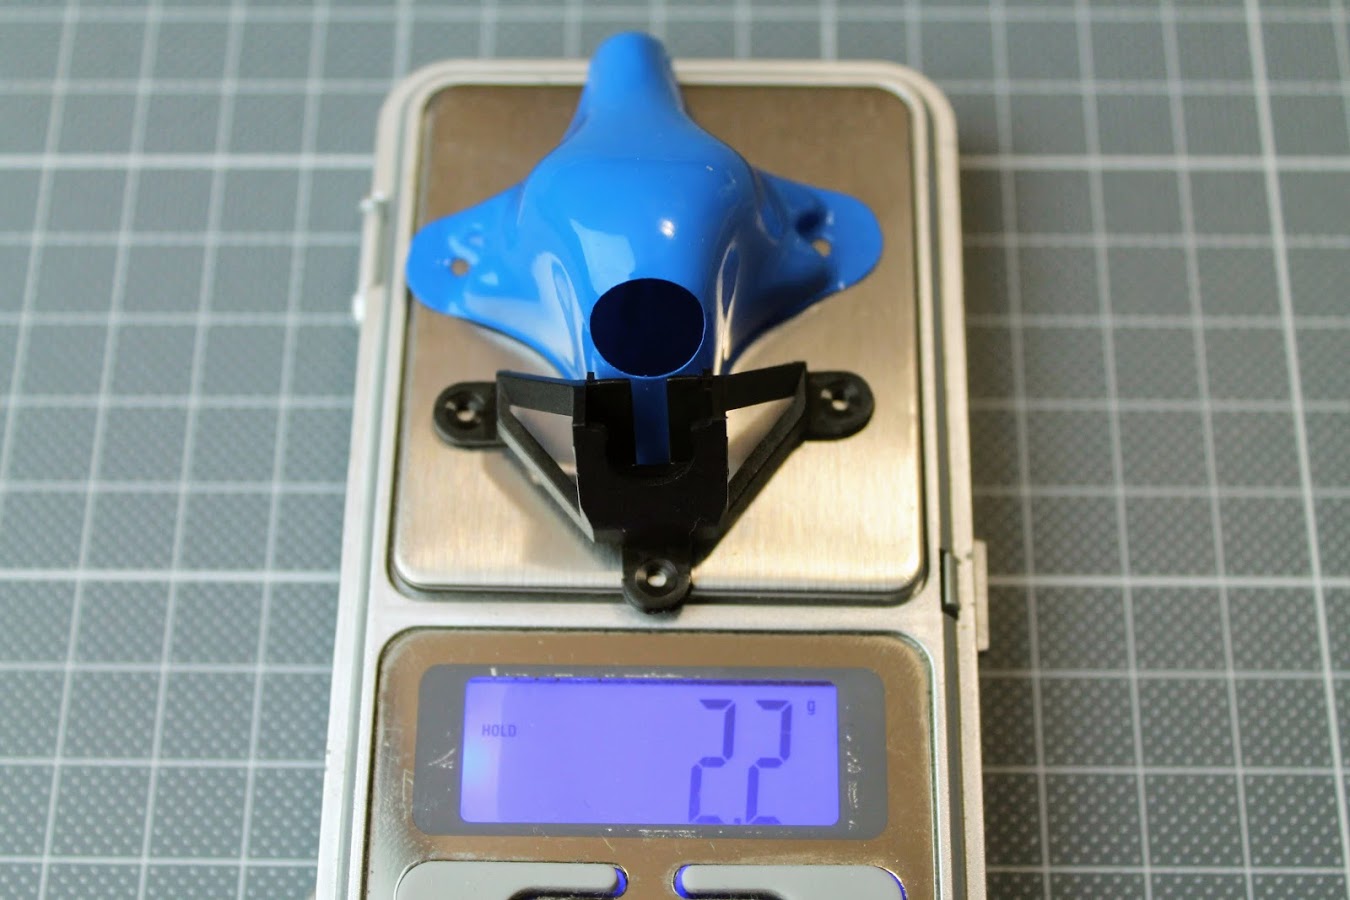
Original canopy and camera holder weights 2.2 grams.
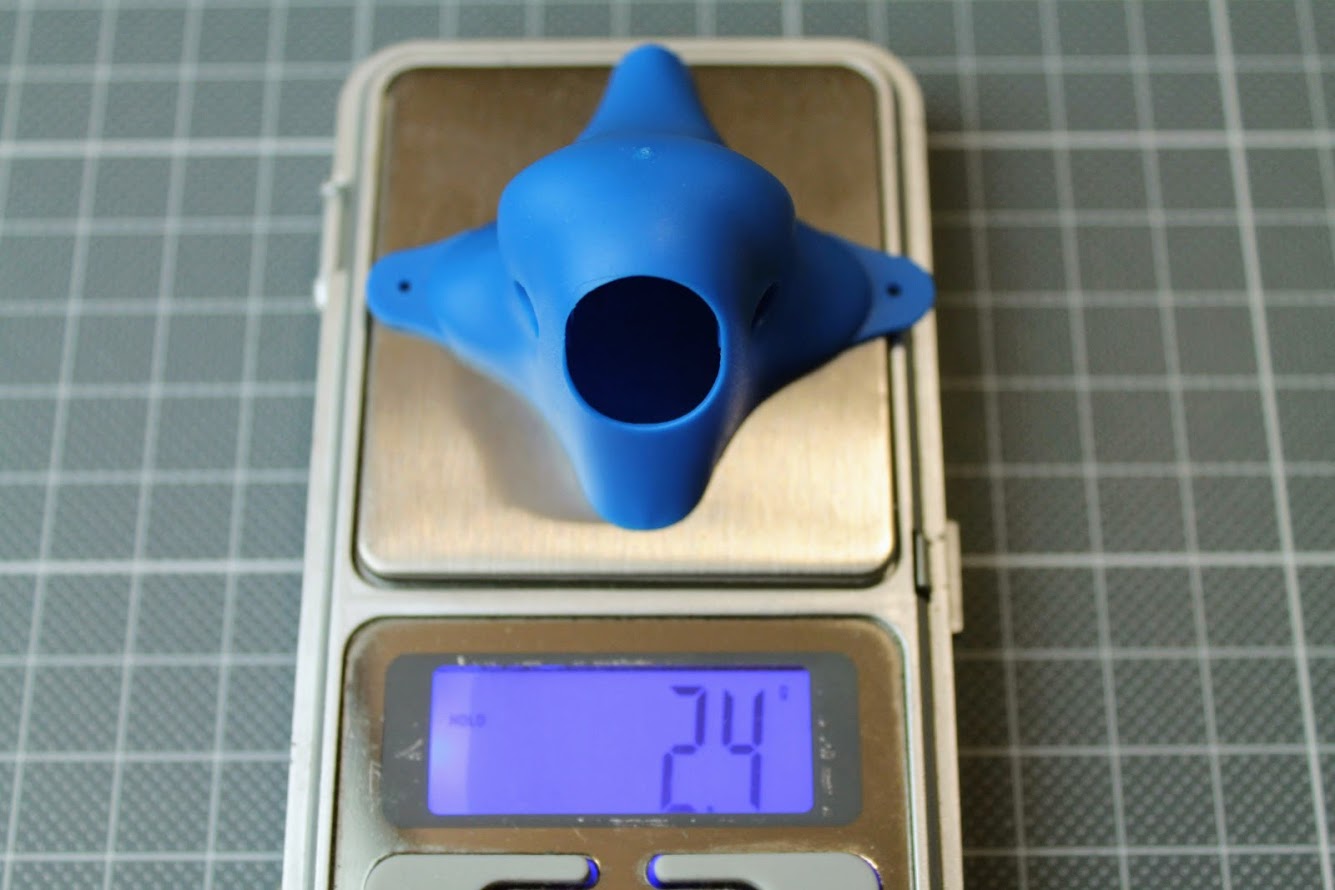
And the bigger and stronger canopy for EOS2 camera weights 2.4 grams. Thats only 0.2 grams difference.
Here is the new canopy with the A01 camera installed.
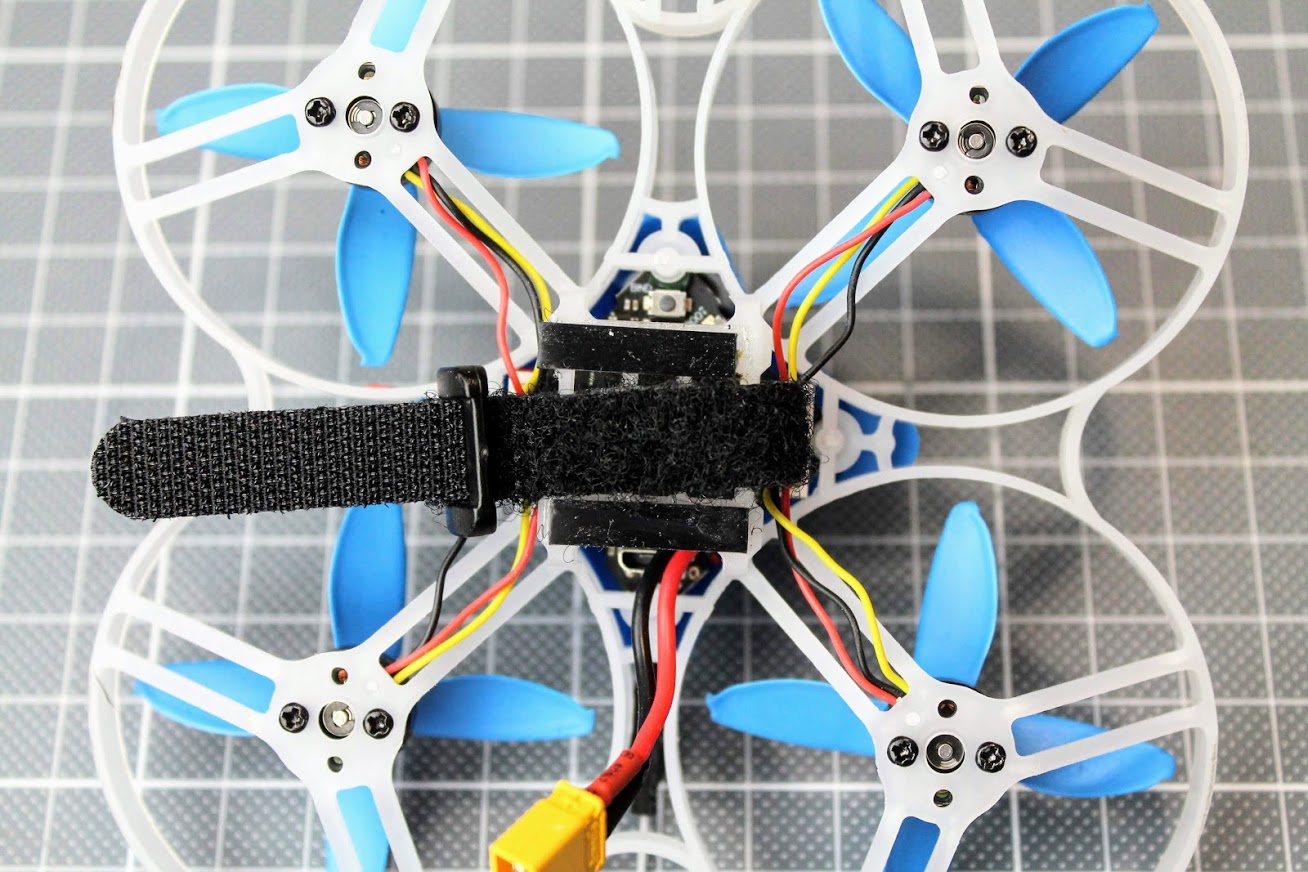
Beta85 Pro2 uses battery strap instead of the plastic battery holder. Battery strap adds weight, but the battery is well secured and there are small rubber grip pads to hold the battery in place.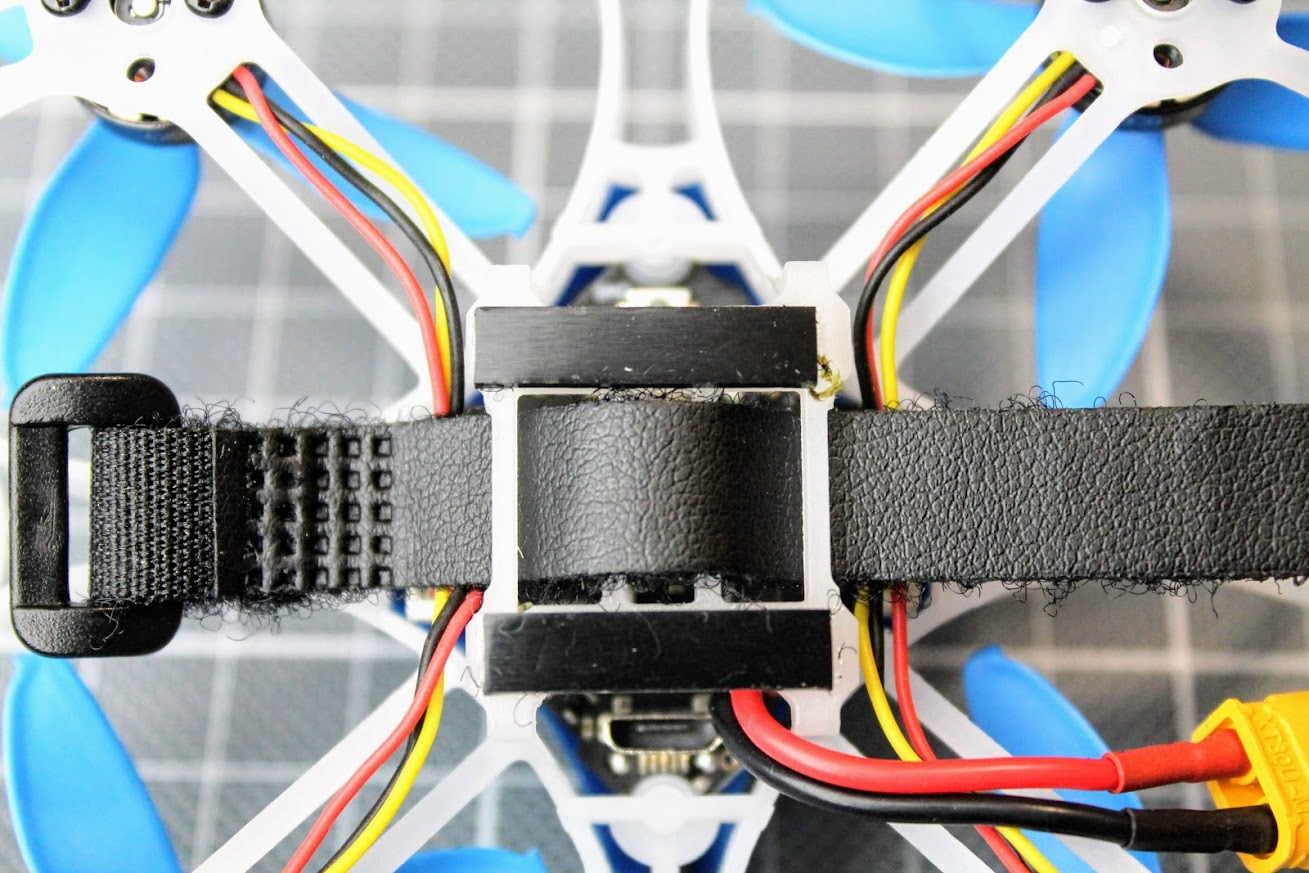
Motor wires aren’t twisted and look messy.
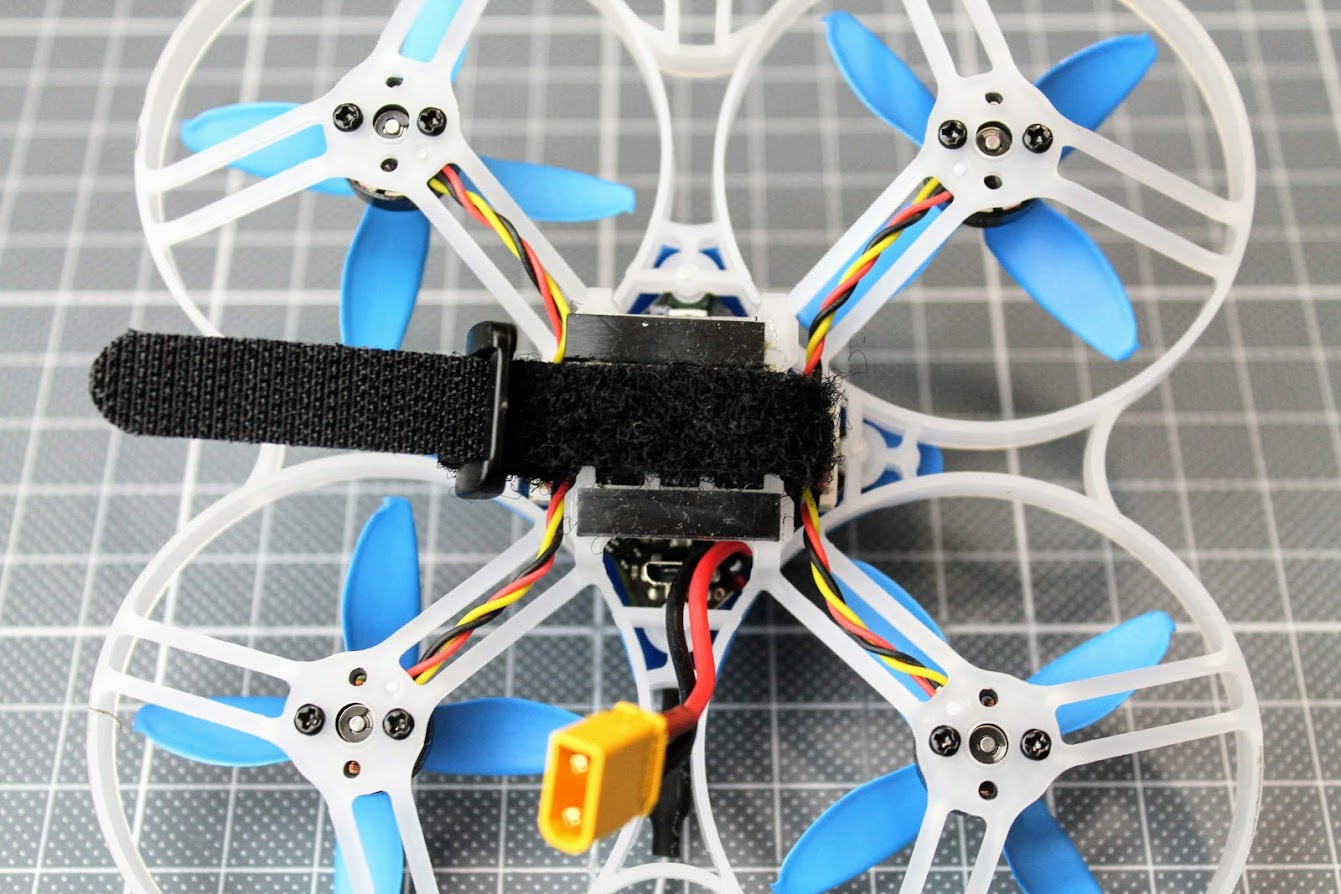
So I have unplugged the motor wires and twisted them up. Now they look neat!
Configuration and setup
By default the Beta85 Pro 2 FC is preinstalled with some unofficial Betaflight 4.0.0 version. This leads to modes tab broken in the Betaflight Configurator vers. 10.5 and later (the issue on the GitHub: https://github.com/betaflight/betaflight-configurator/issues/1335).
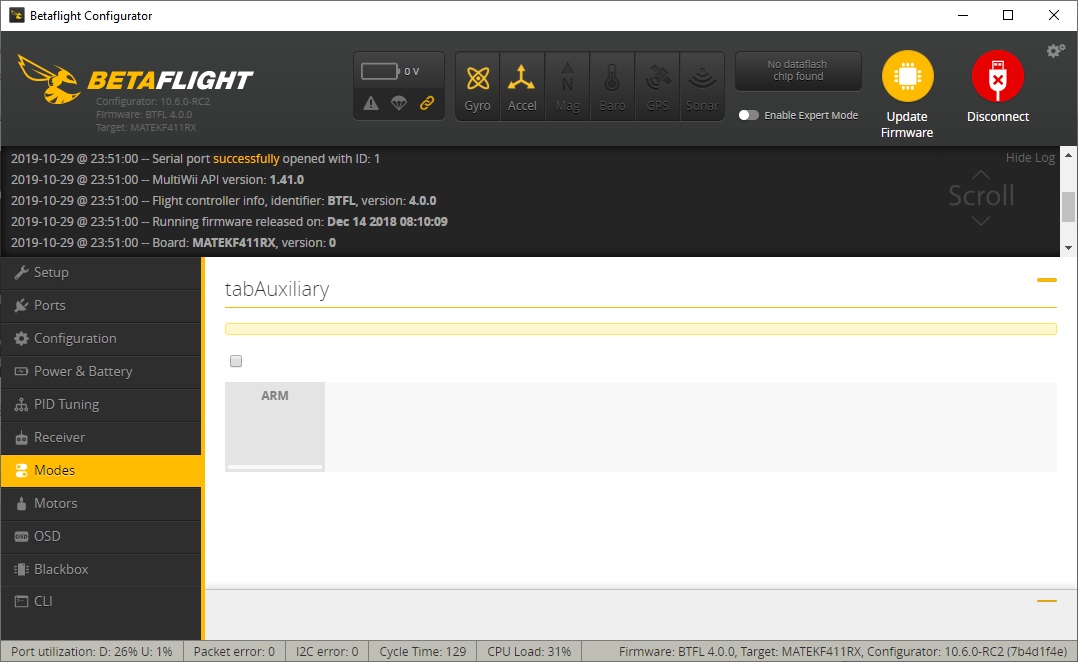
Although the Beta85 Pro 2 has mode tabs preconfigured (Arming set on AUX 1 channel middle pos) and you can start flying right away, I would recommend to update to the latest Betaflight version.
The betaflight firmware target is MATEKF411RX (M41R).
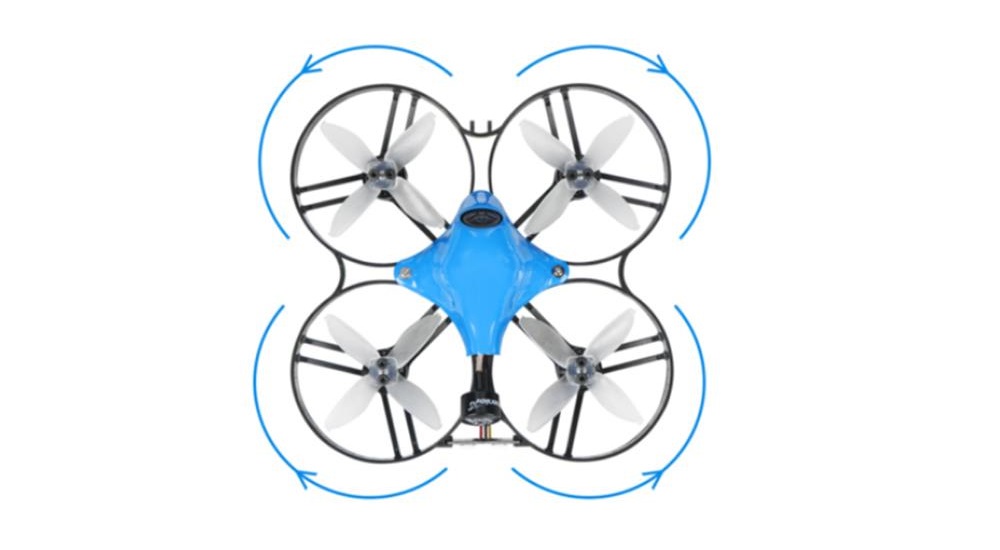
Beta85 Pro 2 is set up with propellers spinning reversed (so called “Props out”).This helps to prevent the washouts on the corners and fast turns.
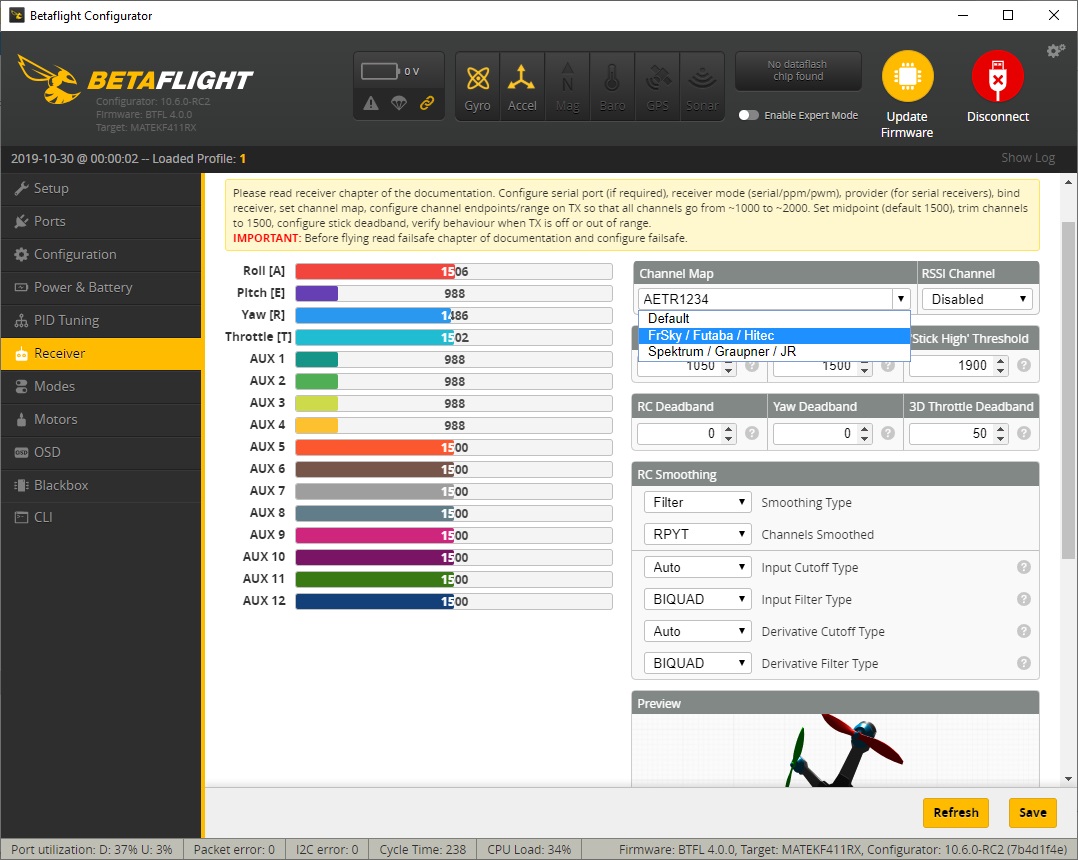
I had to change the channel order to AETR1234, my primary radio is Jumper T12 and has this channel order. You may need to change this also depending on your radio configuration.
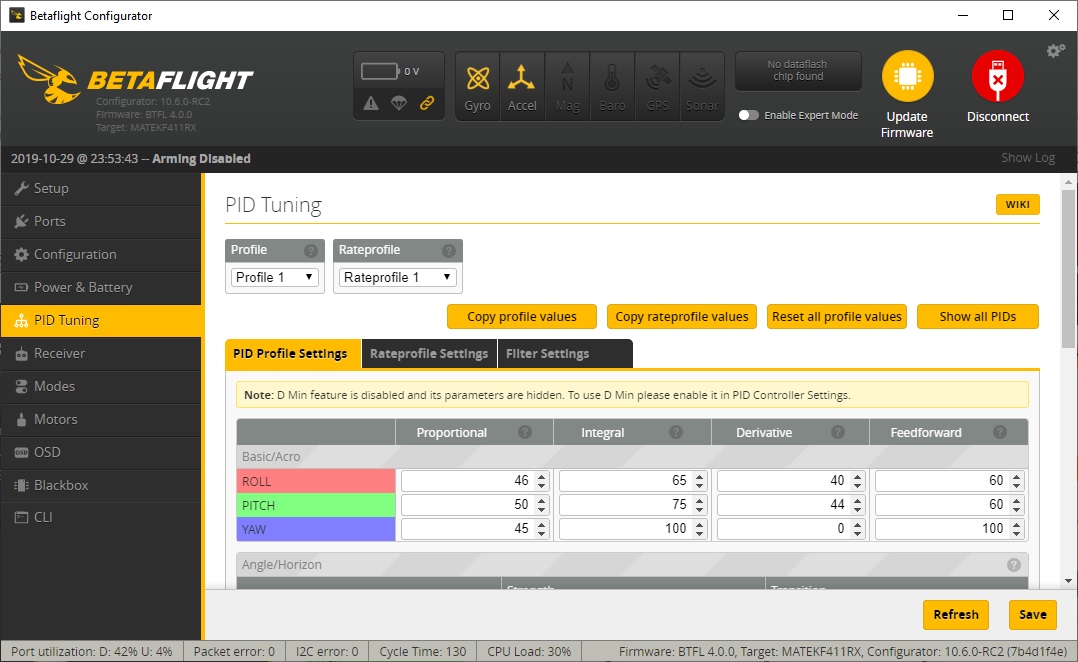
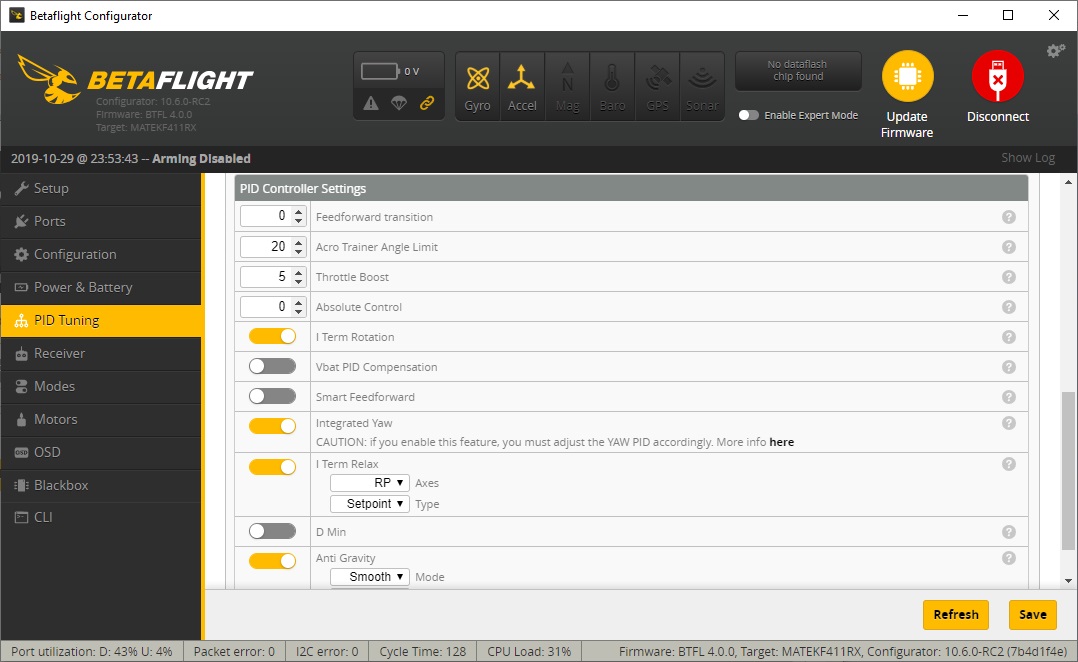
Here are the Beta85 Pro 2 stock betaflight PID values.
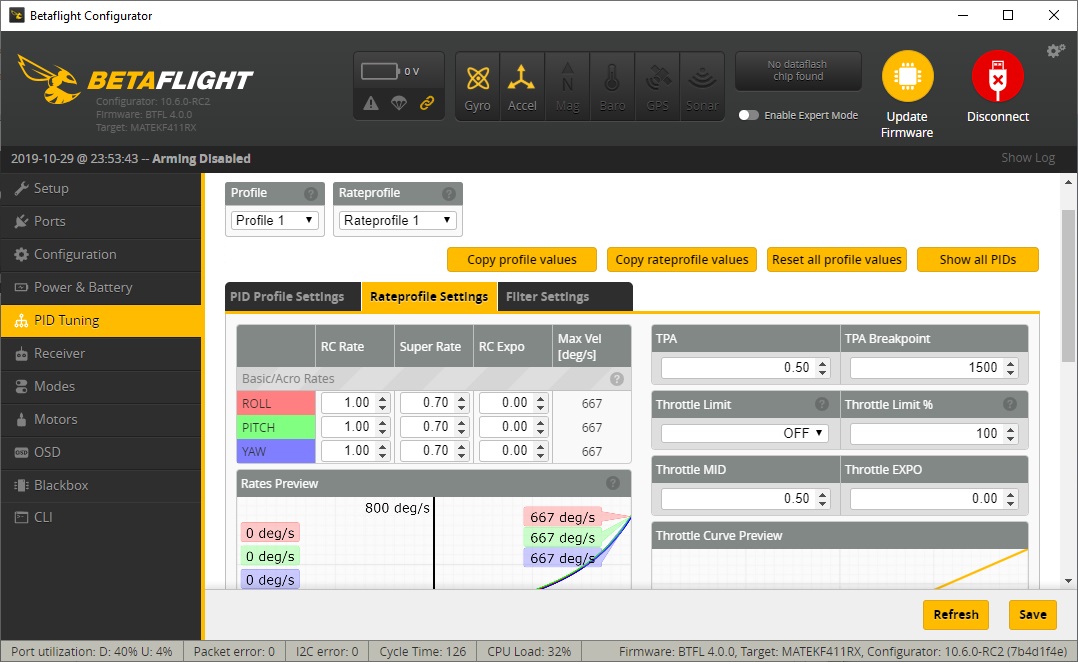
Stock rates:
Binding
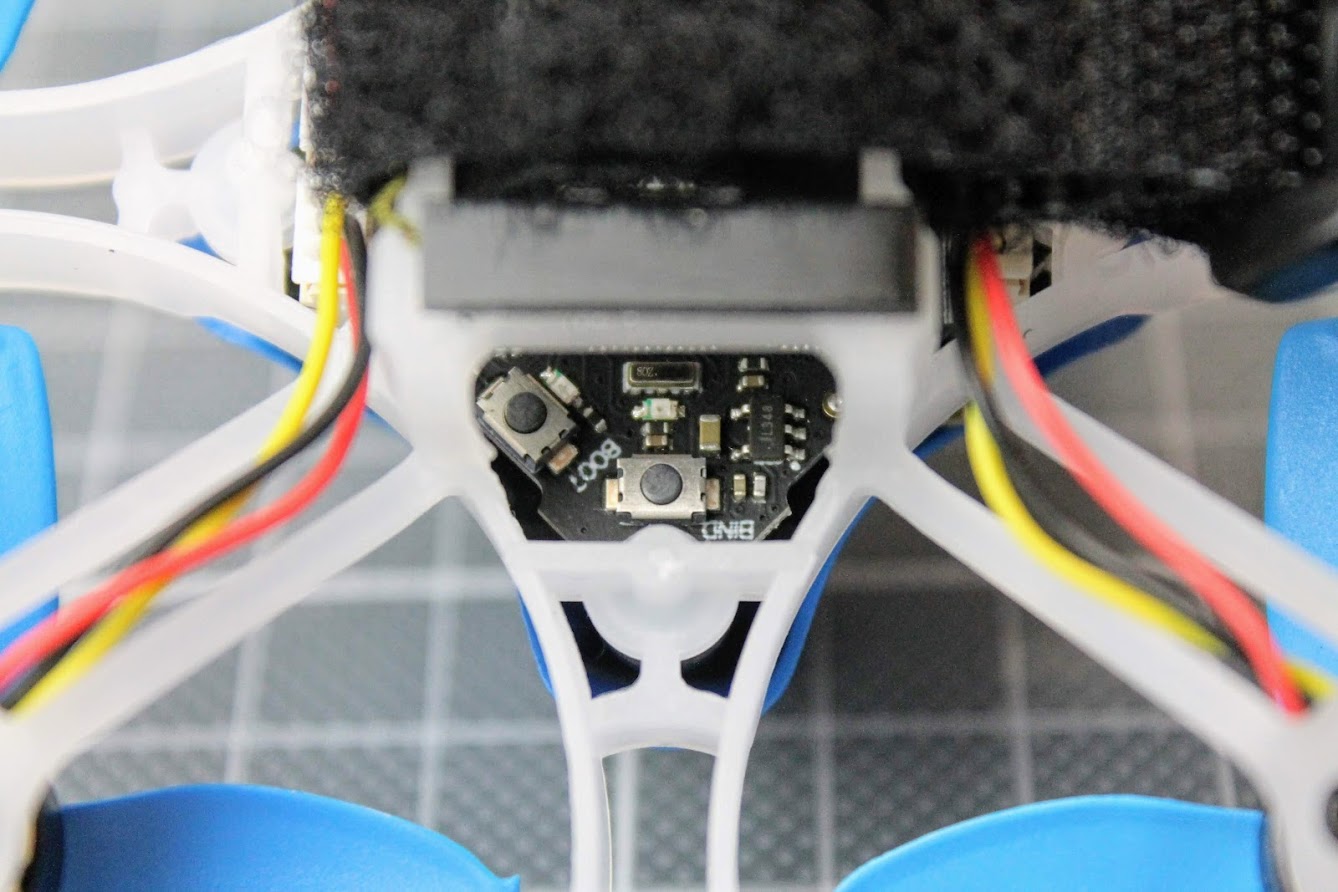
There is binding button on the upper corner of the flight controller.

How To Bind with button
1) Plug in the quad battery, then press the bind button for 3 seconds. Receiver LED (green) is on, which means entering the binding mode.
2) Choose “BIND” option in the transmitter.
3) Binding is successful when receiver LED (green) flashes.
4) Power off and on the quad, receiver LED (green) is on, which means bind is successful and quad is functional.
How To Bind with CLI command
1) Plug in the quad battery, connet the USB cable to PC, and start the Betaflight Configurator
2) Depending on the Betaflight version type the folowing vcommand in CLI tab:
Betaflight 3.x
frsky_bind
Betaflight 4.0.x
bind_rx_spi
Betaflight 4.1.x
bind_rx
There also was beta version of Betaflight 4.0.x that used the command
bind
This command puts the SPI receiver into Bind mode exactly the same as bind button
2) Choose “BIND” option in the transmitter.
3) Binding is successful when receiver LED (green) flashes.
4) Power off and on the quad, receiver LED (green) is on, which means bind is successful and quad is functional.
[To do: flights, betaflight upgrade, camera upgrade]
Links and other information
Beta85 Pro 2 can be purchased @ https://betafpv.com/collections/new-arrival/products/beta85-pro2-whoop-quadcopter-2s
Beta85 Pro 2 spare frame https://betafpv.com/collections/frames-props/products/beta85x-frame
Related Posts
-
 Review: MEPS Space SZ F7 Mini FC
MEPS (Mepsking) is a new, but emerging manufacturer, making its mark in the RC
Review: MEPS Space SZ F7 Mini FC
MEPS (Mepsking) is a new, but emerging manufacturer, making its mark in the RC -
 HGLRC Thor Pro parallel charging board
HGLRC Thor Pro charger board is battery parallel charging board with protection fuses and
HGLRC Thor Pro parallel charging board
HGLRC Thor Pro charger board is battery parallel charging board with protection fuses and
Hey,
I have bought the BetaFPV canopy for EOS2 camera and it doesnt fit to the screw holes of the Beta85 Pro2 Frame. how did you use it ? what did i miss?
do you know of some extra camera case that can be used instead of the double sided tape
so it can be held by screws so the angel can be adjusted
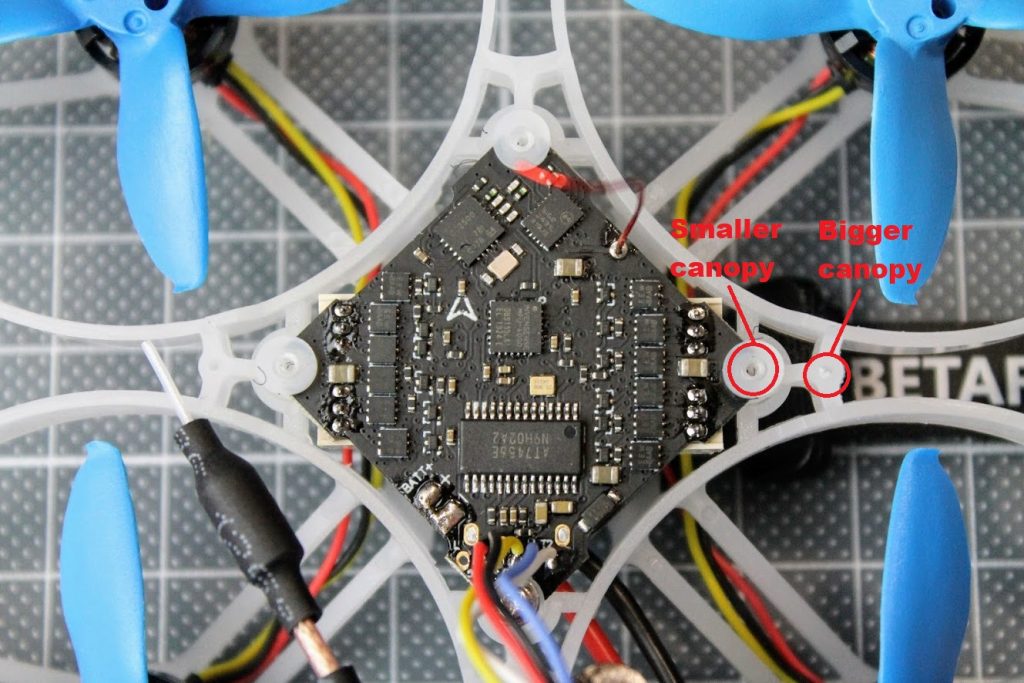
Hi, Beta85 Pro2 frame has holes for smaller and bigger canopy. See the photo:
Thank you,
Now i see that i accidentally bought betafpv 85x frame
and not the 85 pro 2 frame. my mistake.
Montis, thanks for taking the time to put this together. I spent 4 hours trying to get my 85 pro 2 up and running until I found your review that identified the firmware I needed to install. I am pretty new to Betaflight and all of this flashing firmware and stuff. Now I just need to learn how to control this little speedster. Thanks again
I’m happy it helped! Thanks for the feedback.
Is there a way to upgrade camera (to this one RunCam Racer Nano 2)? Will it fit the original canopy or at least canopy for EOS2?
Will not fit original canopy, however canopy for EOS2 should fit. EOS2 and RC Racer Nano 2 have the same 14mm mount.